A Fresh Install of OpenLiteSpeed on Centos 8, Alma-Linux or Rocky Linux
I put this tutorial together because I wanted to set up a test server based on Rocky Linux that ran OpenLiteSpeed and I could not find an online article that worked if you followed the instructions step by step. So if you’re looking to install OpenLiteSpeed on Rocky Linux, Alma-Linux, or Centos 8 you’ve come to the right place because what I’ve outlined below works on a clean install.
Installing OpenLiteSpeed
Our first step is to install the OpenLiteSpeed repository. We can do this using the sudo command or escalate our privileges for this session using the sudo su command.
$ sudo su

# rpm -Uvh http://rpms.litespeedtech.com/centos/litespeed-repo-1.1-1.el8.noarch.rpm

Retrieving http://rpms.litespeedtech.com/centos/litespeed-repo-1.1-1.el8.noarch.rpm
Verifying...                          ################################# [100%]
Preparing...                          ################################# [100%]
Updating / installing...
   1:litespeed-repo-1.2-1.el8         ################################# [100%]
Next, we are going to install OpenLiteSpeed using dnf.
# dnf install openlitespeed

Invalid configuration value: failovermethod=priority in /etc/yum.repos.d/litespeed.repo; Configuration: OptionBinding with id "failovermethod" does not exist
This failovermethod issue is the first problem you might encounter when using a distribution based on Centos 8. Let’s take care of that by editing the litespeed.rep file and commenting out the failovermethod lines using the # symbol. My preferred editor is nano.
# nano /etc/yum.repos.d/litespeed.repoYou can see by the file contents below, there are four lines we need to comment out.
[litespeed]
name=LiteSpeed Tech Repository for CentOS $releasever - $basearch
baseurl=http://rpms.litespeedtech.com/centos/$releasever/$basearch/
#failovermethod=priority
enabled=1
gpgcheck=1
gpgkey=file:///etc/pki/rpm-gpg/RPM-GPG-KEY-litespeed

[litespeed-update]
name=LiteSpeed Tech Update Repository for CentOS $releasever - $basearch
baseurl=http://rpms.litespeedtech.com/centos/$releasever/update/$basearch/
#failovermethod=priority
enabled=1
gpgcheck=1
gpgkey=file:///etc/pki/rpm-gpg/RPM-GPG-KEY-litespeed

[litespeed-edge]
name=LiteSpeed Tech Edge Repository for CentOS $releasever - $basearch
baseurl=http://rpms.litespeedtech.com/edge/centos/$releasever/$basearch/
#failovermethod=priority
enabled=0
gpgcheck=1
gpgkey=file:///etc/pki/rpm-gpg/RPM-GPG-KEY-litespeed

[litespeed-edge-update]
name=LiteSpeed Tech Edge Update Repository for CentOS $releasever - $basearch
baseurl=http://rpms.litespeedtech.com/edge/centos/$releasever/update/$basearch/
#failovermethod=priority
enabled=0
gpgcheck=1
gpgkey=file:///etc/pki/rpm-gpg/RPM-GPG-KEY-litespeed
Save the file and try installing openlitespeed again. This time it will work.
# dnf install openlitespeedInstalling PHP 7.4, 8.0 or 8.1
Now that we have OpenLiteSpeed installed we’re going to install some of the more useful PHP versions. But first we need to install the EPEL repository
# dnf install epel-releaseOnce that’s done, we can install the php package(s) we want. In this tutorial I am providing the commands that work for PHP versions 7.4, 8.0 and 8.1 below.
# dnf install lsphp74 lsphp74-mysqlnd lsphp74-process lsphp74-mbstring lsphp74-mcrypt lsphp74-gd lsphp74-opcache lsphp74-bcmath lsphp74-pdo lsphp74-common lsphp74-xml

# dnf install lsphp80 lsphp80-mysqlnd lsphp80-process lsphp80-mbstring lsphp80-gd lsphp80-opcache lsphp80-bcmath lsphp80-pdo lsphp80-common lsphp80-xml

# dnf install lsphp81 lsphp81-mysqlnd lsphp81-process lsphp81-mbstring lsphp81-gd lsphp81-opcache lsphp81-bcmath lsphp81-pdo lsphp81-common lsphp81-xml
Now that our PHP versions are installed, let’s double back and change the default administrative password for OpenLiteSpeed, which is 123456. To do this run the command shown below and pick a password that is harder to guess than 123456.
# /usr/local/lsws/admin/misc/admpass.sh

Please specify the user name of administrator.
This is the user name required to login the administration Web interface.

User name [admin]: admin

Please specify the administrator's password.
This is the password required to login the administration Web interface.

Password:
Retype password:
Administrator's username/password is updated successfully!
Installing MariaDB Server
We’re inching closer to being able to run OpenLiteSpeed, but first we need to set up a database. In this example, we are going to install mariadb using the following command:
# dnf install mariadb mariadb-serverOnce the installation process is complete, we are going to start the server using one of the two commands below. (Again, this is a problem you may run into using other tutorials.)
# systecmtl start mariadb

If this fails, try

# service mariadb start
Now that we’ve started mariadb, we’re going to change the systemctl settings so that mariadb always runs on a reboot too.
# systemctl enable  mariadb

Created symlink /etc/systemd/system/mysql.service → /usr/lib/systemd/system/mariadb.service.
Created symlink /etc/systemd/system/mysqld.service → /usr/lib/systemd/system/mariadb.service.
Created symlink /etc/systemd/system/multi-user.target.wants/mariadb.service → /usr/lib/systemd/system/mariadb.service.
At this point, let’s lock down mariadb by running the secure installation script.
# mysql_secure_installationIt’s always a good idea to read the instructions before answering questions. This is a clean install so root does not have a mariadb password. (We are not being asked for root’s system password.) So just press enter, then say “y” to the questions as shown below.
In order to log into MariaDB to secure it, we'll need the current
password for the root user.  If you've just installed MariaDB, and
you haven't set the root password yet, the password will be blank,
so you should just press enter here.

Set a root password? [Y/n] y

Remove anonymous users? [Y/n] y


Normally, root should only be allowed to connect from 'localhost'.  This
ensures that someone cannot guess at the root password from the network.

Disallow root login remotely? [Y/n] y
Remove test database and access to it? [Y/n] y
Reload privilege tables now? [Y/n] y
Starting OpenLiteSpeed
At this point we have installed OpenLiteSpeed, MariaDB and PHP. Now it is time to start OpenLiteSpeed and change the systemctl setting so that it runs on start up too.
# systemctl start lsws

# systemctl enable lsws
We can also check the status of OpenLiteSpeed as shown below:
# systemctl status lsws

● lshttpd.service - OpenLiteSpeed HTTP Server
   Loaded: loaded (/usr/lib/systemd/system/lshttpd.service; enabled; vendor preset: disabled)
   Active: active (running) since Mon 2022-02-21 08:21:55 EST; 1h 26min ago
 Main PID: 1276 (litespeed)
   CGroup: /system.slice/lshttpd.service
           ├─1276 openlitespeed (lshttpd - main)
           ├─1280 openlitespeed (lscgid)
           ├─1281 openlitespeed (lshttpd - #01)
           ├─1282 openlitespeed (lshttpd - #02)
           ├─1283 openlitespeed (lshttpd - #03)
           ├─1284 openlitespeed (lshttpd - #04)
           ├─1285 openlitespeed (lshttpd - #05)
           ├─1286 openlitespeed (lshttpd - #06)
           ├─1288 openlitespeed (lshttpd - #07)
           └─1289 openlitespeed (lshttpd - #08)

Feb 21 08:21:52 localhost.localdomain systemd[1]: Starting OpenLiteSpeed HTTP Server...
Feb 21 08:21:53 localhost.localdomain lswsctrl[1237]: [OK] litespeed: pid=1276.
Feb 21 08:21:55 localhost.localdomain systemd[1]: Started OpenLiteSpeed HTTP Server.
OpenLiteSpeed comes with an web interface that can be used to administer the tool. Admin authentication takes place via port 7080, so we need to open this port in our firewall and reload it.
# firewall-cmd --add-port=7080/tcp --permanent

success
To reload the firewall use:
# firewall-cmd --reload

success
OpenLiteSpeed Web Interface
We’re going to use OpenLiteSpeed’s web interface to configure it to use PHP 8.0, but the same approach can be used for versions 7.4 or 8.1. Let’s point our browsers to the server’s IP address and port 7080. In my case this was:
http://172.24.16.254:7080
And you should be greeted with the following screen.

Use the credentials you created earlier during the OpenLiteSpeed install log in and get to the OpenLiteSpeed web admin dashboard.
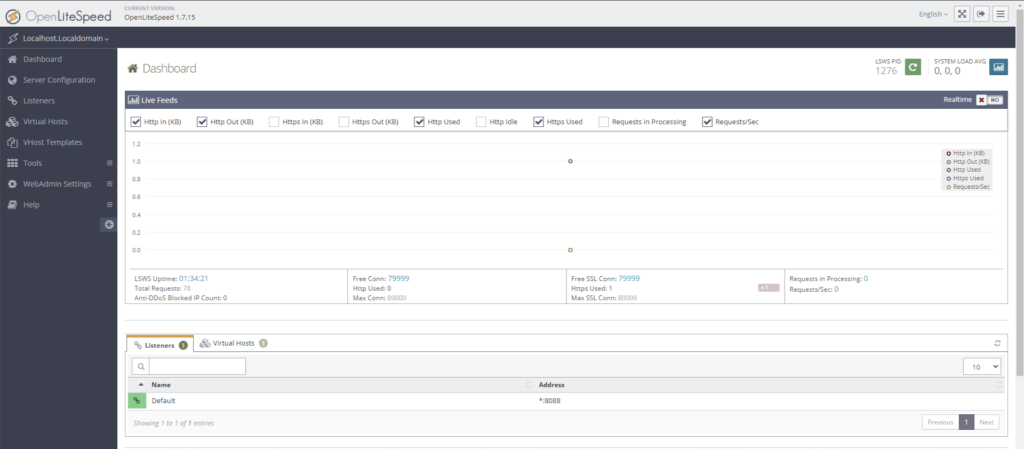
On the OpenLiteSpeed Dashboard, select ‘Server Configuration’ from the menu on the left side of the screen. Once opened, selected the External App tab as shown below.
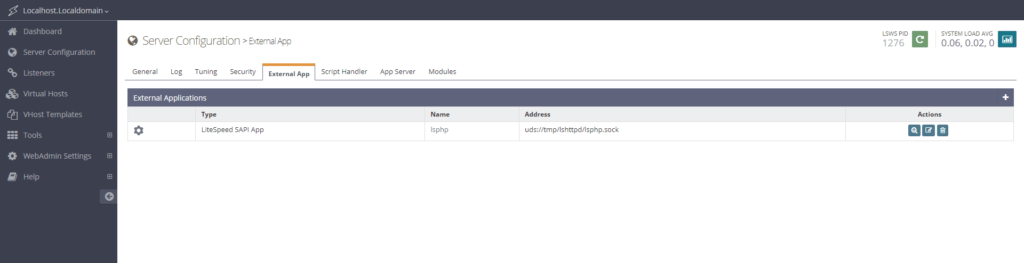
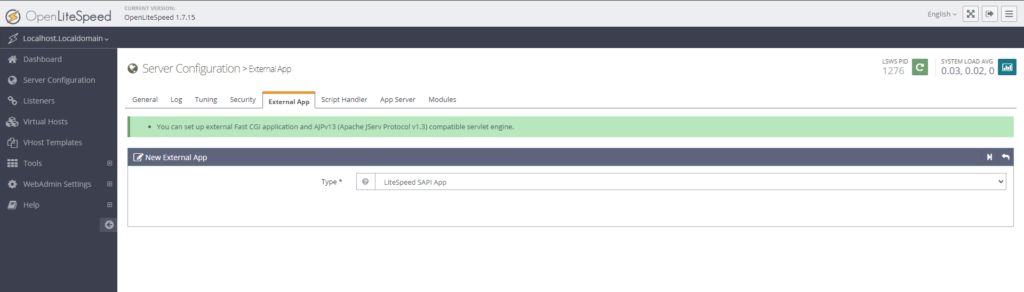
From here we can configure php versions 7.4, 8.0 or 8.1 by clicking the add ‘+’ button on the right side of the screen. For the type, choose the ‘LiteSpeed SAPI App’ and click the ‘Next’ button.
Enter the following for PHP 8.0:
Name: lsphp80
Address: uds://tmp/lshttpd/lsphp.sock
Notes: php 8.0 for OpenLiteSpeed
Max Connections: 10
Initial Request Timeout (secs): 60
Retry Timeout (secs): 0
Persistent Connection: Yes
Response Buffering: No
Start By Server: Yes
Command: $SERVER_ROOT/lsphp80/bin/lsphp
Back Log: 100
Instances: 1
Memory Soft Limit (bytes): 2047M
Memory Hard Limit (bytes): 2047M
Process Soft Limit: 1400
Process Hard Limit: 1500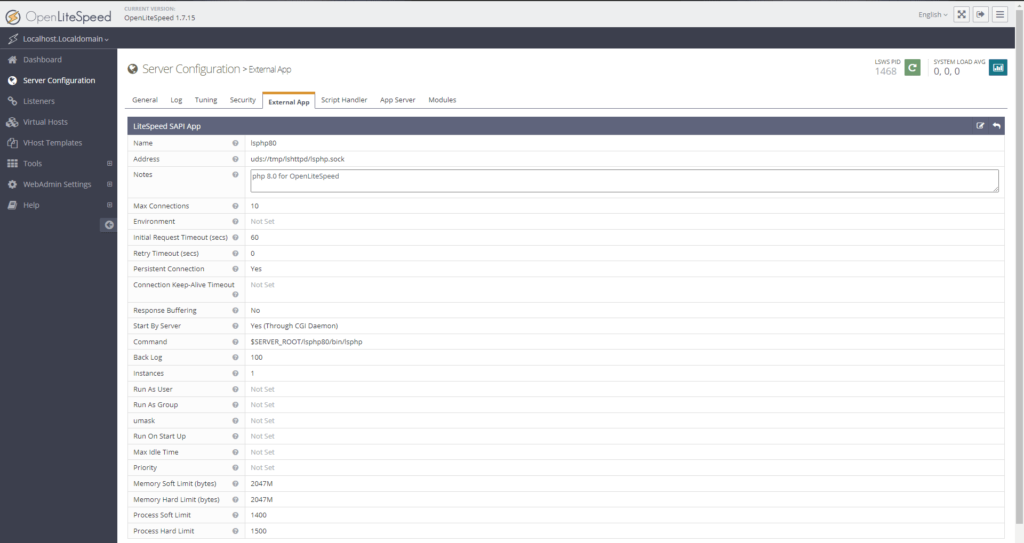
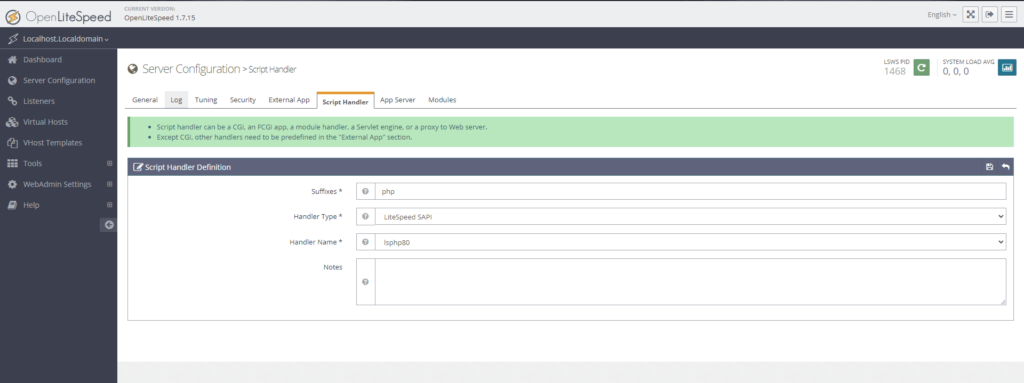
Next, we will change the default PHP version for OpenLiteSpeed to 8.0. On the ‘Server Configuration’ menu, we need to select the ‘Script Handler’ tab. Then click the ‘Edit’ button. On the ‘Handler Name’ field, choose the ‘lsphp80’ and then click the ‘Save’ button.
At this point we have installed OpenLiteSpeed, MariaDB and three different PHP versions on the server. We’ve also configured OpenLiteSpeed to use PHP 8.0 as the default Handler. Now it’s time to open ports 80 and 443 on our firewall and reload it using the following commands:
# firewall-cmd --add-service=http --permanent
success
# firewall-cmd --add-service=https --permanent
success
# firewall-cmd --reload
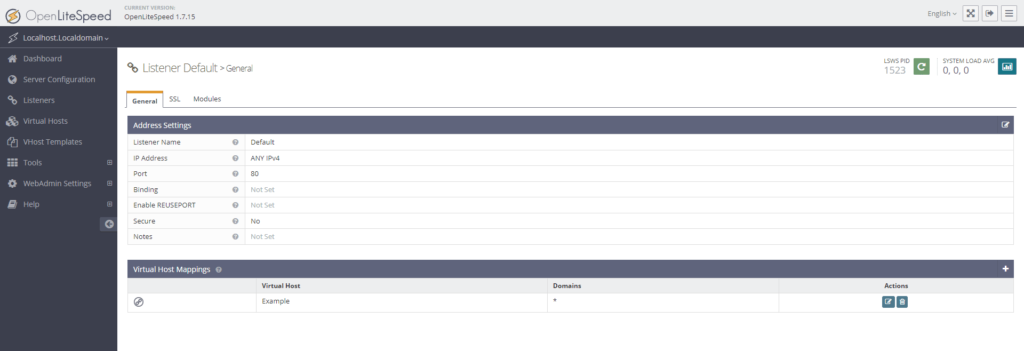
successOur final configuration step is to add the ports 80 and 443 to OpenLiteSpeed’s Listeners. Click the ‘Default’ link, edit the entry by adding 80 to the Port field as shown below, then click Save.
Now click the ‘restart” button in the upper right hand corner of your screen to load our changes and restart the OpenLiteSpeed service. Once complete, if we point our browser to our server’s IP address, which in my case was http://172.24.16.254, we should see the following screen!
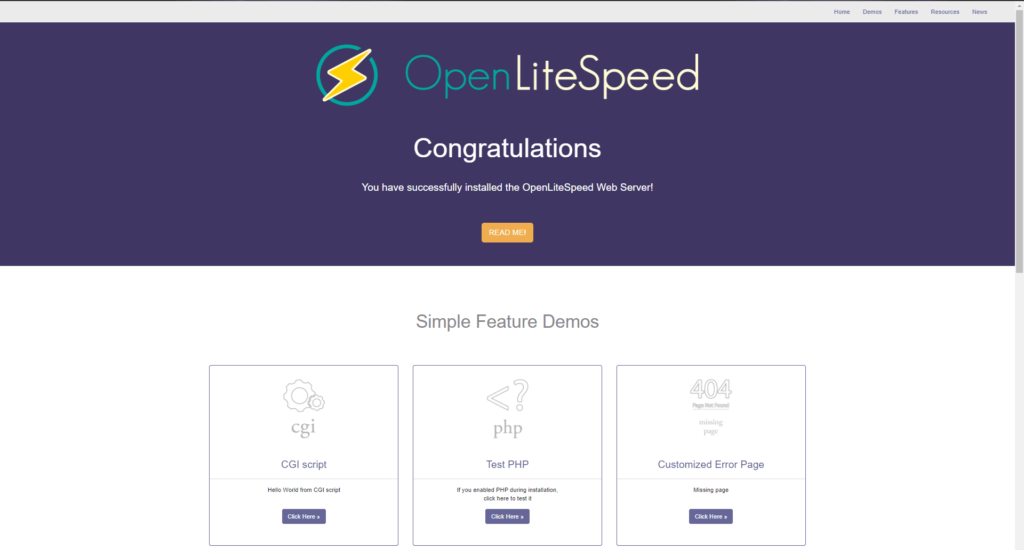
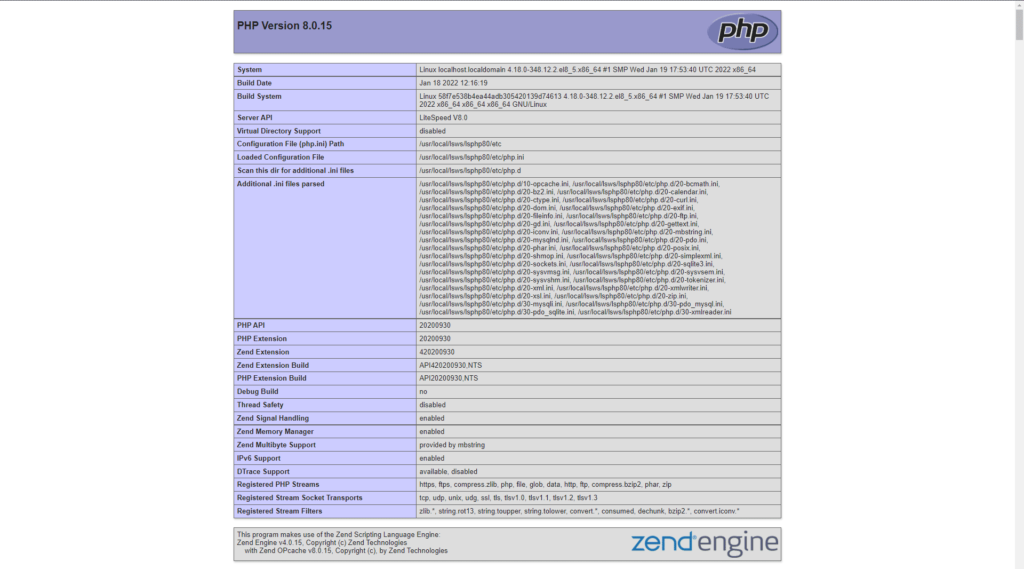
We can test some simple features, including taking a look at our PHP configuration by selecting the ‘Test PHP’ section and the ‘Click Here’ button. If all went as planned, you will be greeted with the phpinfo page as below. And at this point we have a working instance of OpenLiteSpeed.